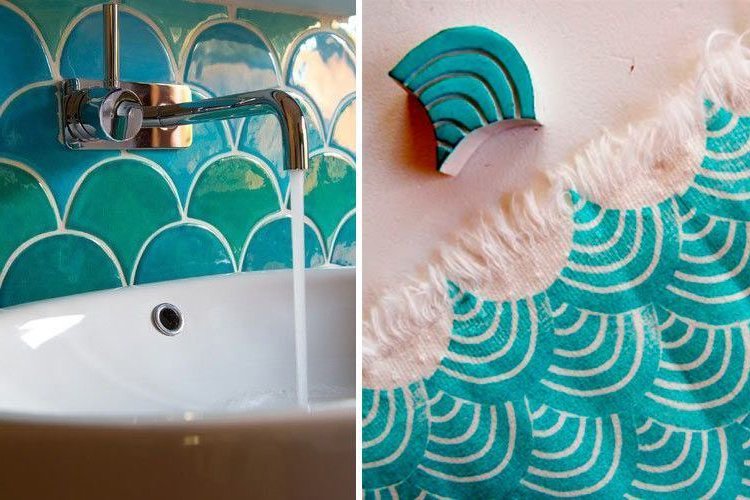
How to play with the placement of bathroom tiles.
A few weeks ago we told you in an article how to innovate aesthetically in the bathroom with tiles of different formats. The problem with these used to be the cost: any tile that is out of the standard (rhombuses, hexagons, curved formats, etc.) usually multiplies its price by four.
That's why this time we want to focus on the most austere pockets giving ideas to achieve equally original bathroom walls but using the traditional formats. How? Playing with the placement of the tiles!!!
This option can be more economical than the previous one, since tiles with "alternative" formats are usually priced well above the usual square and rectangular ones, so if your economy is not for many joys, you can innovate in the placement and get real wonders. Let's see some ideas!
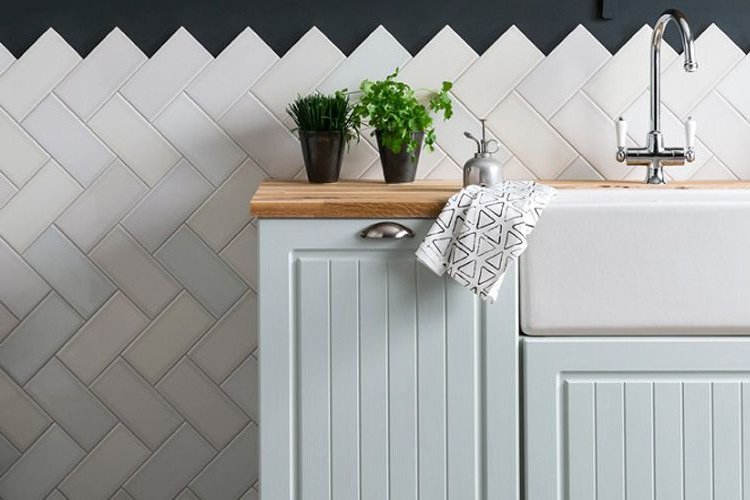
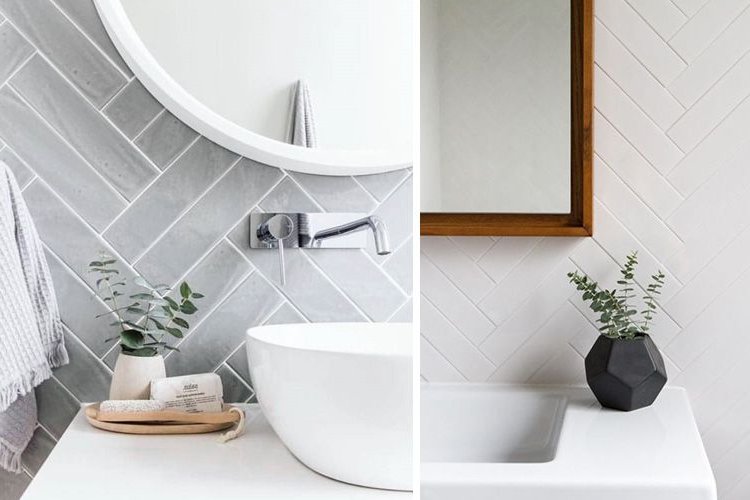
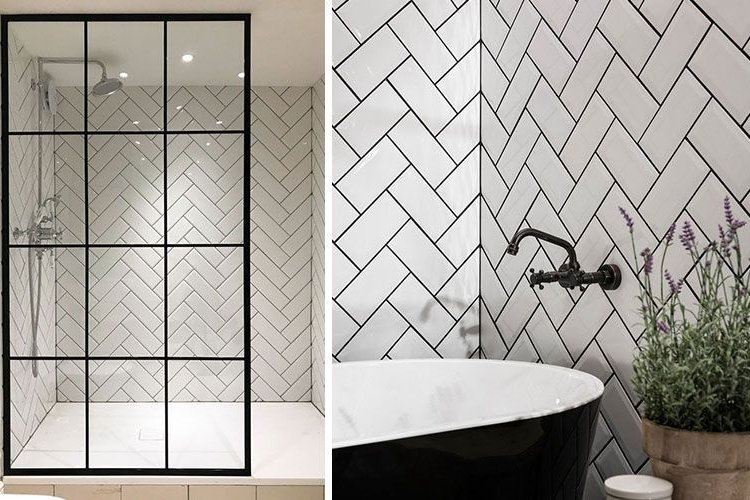
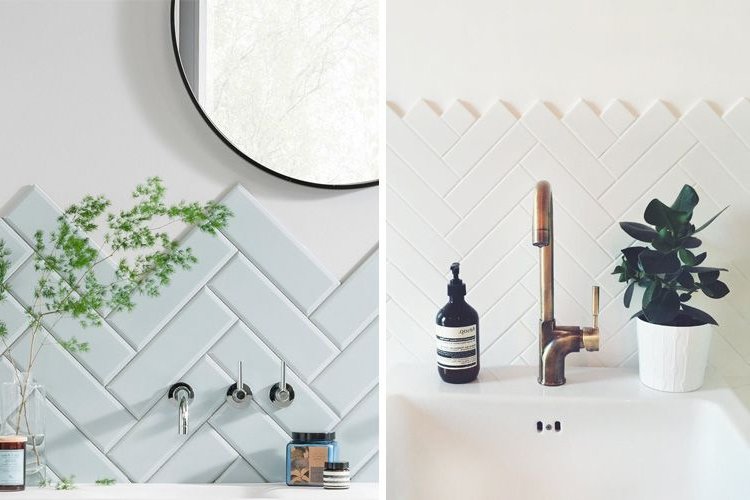
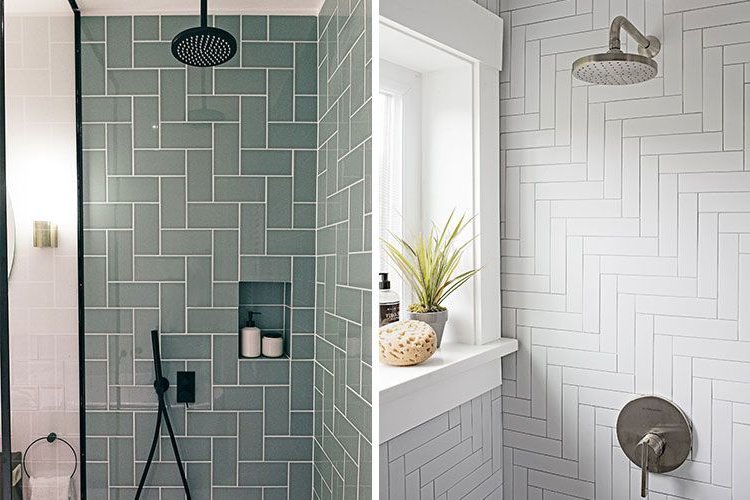
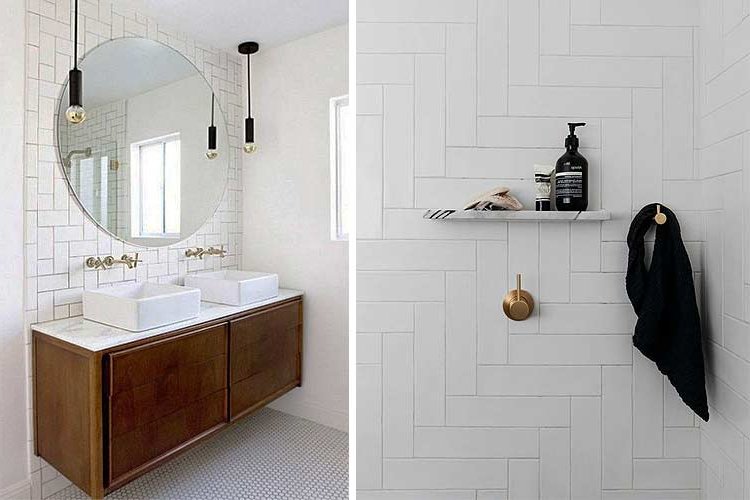
Rectangular herringbone tiles
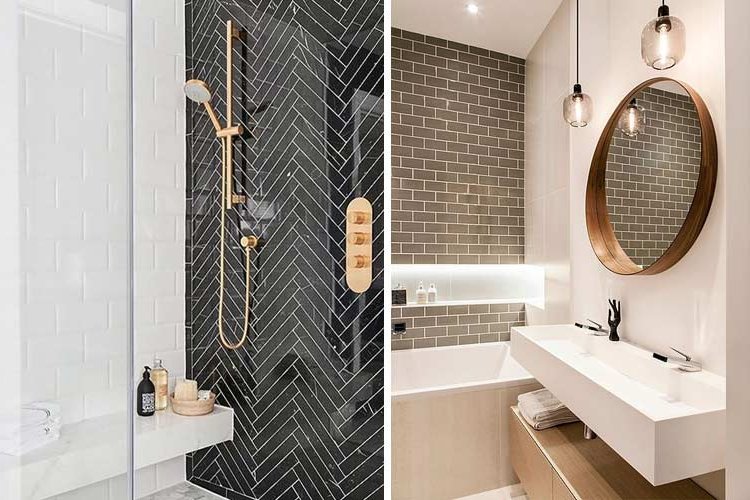
What is cheaper than a 10×20 tile in plain color? And yet, if you decide to lay it in herringbone instead of the usual "brick" format, you will achieve a very dynamic and trendy effect.
In fact, this type of installation is usually more aesthetically pleasing with very rectangular tiles, whose long side is four or five times the short side, but it also works with the classic sizes.
The most common is to place them diagonally one by one, but if you want to make things even more complicated, you can also create a herringbone by placing the tiles two by two.
If you also add a black grout and choose faucets or screens in the same color... voila, you have a very modern bathroom!
This option also allows you to play with the tile-paint combination if you decide not to tile the entire wall, creating very curious effects in its finish.
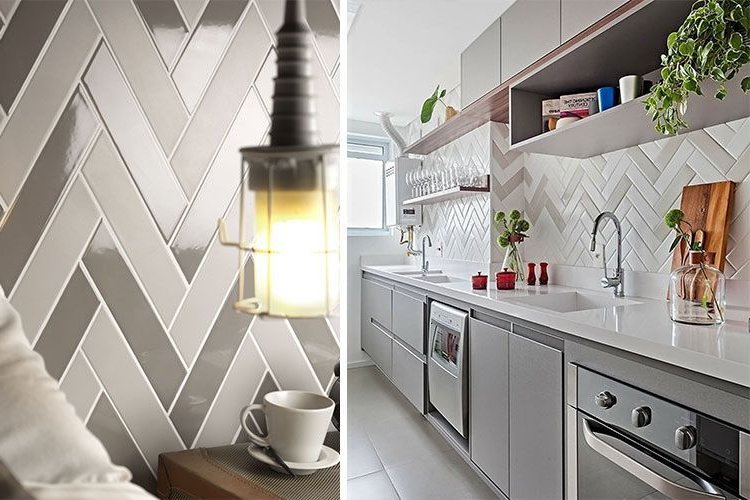
Chevron Tiles
If you want a more perfect chevron aesthetic than the previous one, you can do it with tiles expressly prepared for it. These come with diagonal sides, so that they fit perfectly when joined together to form a straight line in the middle.
This type of tile tends to be somewhat more expensive than the normal rectangular tiles, but still does not reach the prices of the more alternative ones.
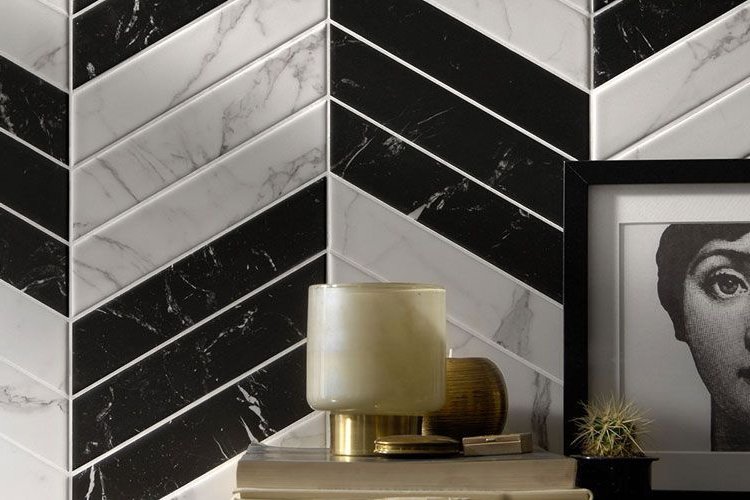
Although they are usually placed horizontally, they are also very decorative and original when placed vertically, either in the same color or in subtle different shades.
Another way to play with them is to mix contrasting colors between them (either intercalated or in two different planes), or to mix them with grout or paint in a similar way to the previous case.
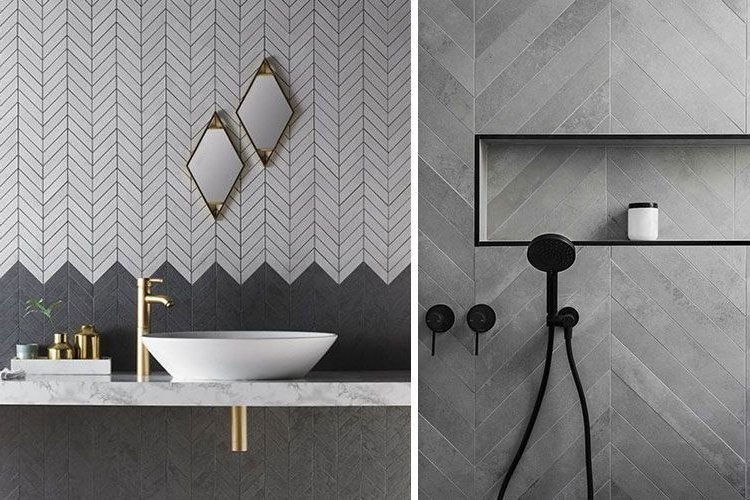
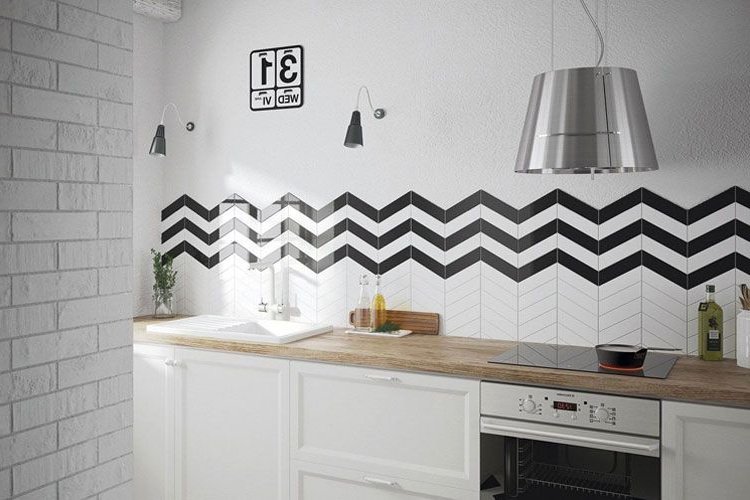
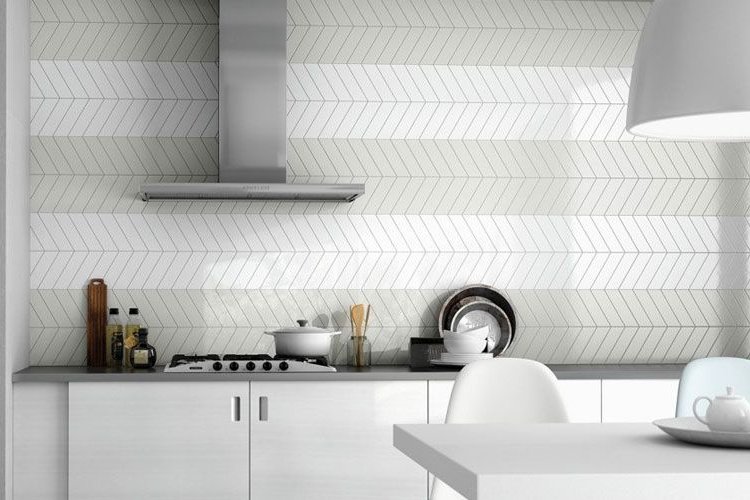
Zigzag tiles
Another original way to lay a rectangular tile is to lay it in a zig zag pattern, with the base horizontal.
In the background it is like generating a "diagonal herringbone" (if you look at the images from one corner to the other you will appreciate it), but when placed horizontally, the resulting effect is a kind of a curious checkerboard tetris-like pattern.
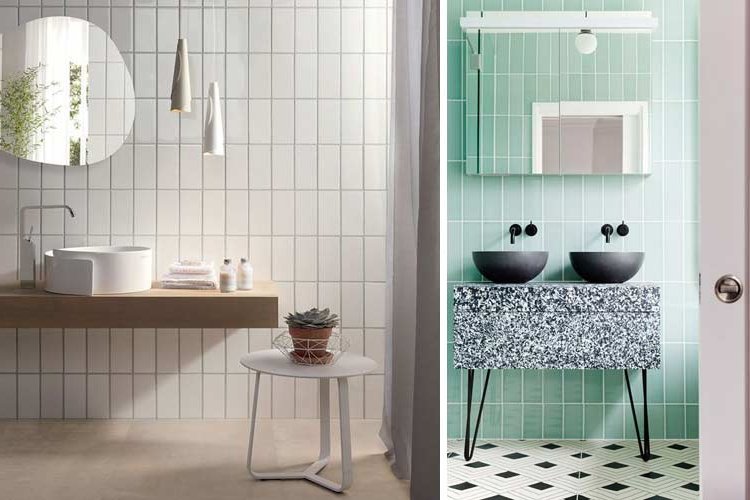
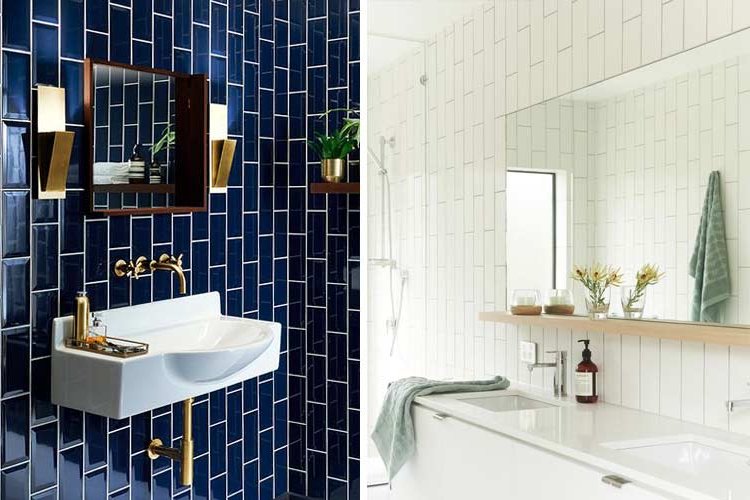
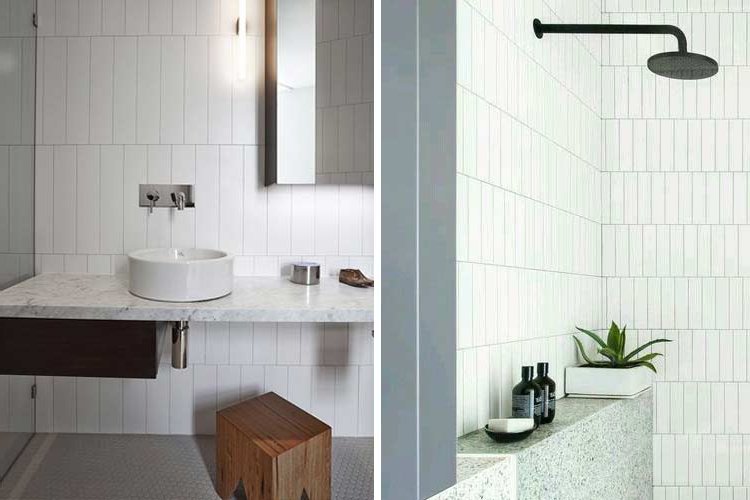
Vertical placement
When we think of rectangular tile, horizontal tile usually comes to mind, either all in a row for more minimalist options, or laid like a brick wall.
However, a more original and less exploited version (although it is already seen in many bathrooms decorated by interior designers) is the placement of rectangular tiles vertically.
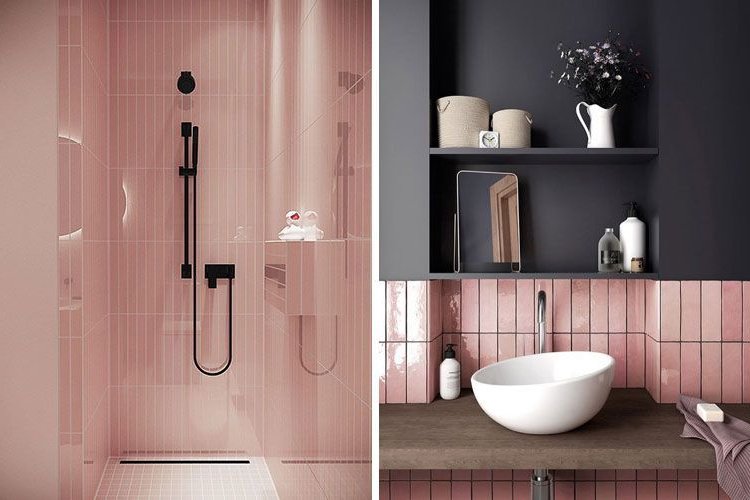
Whether alone or combined with paint, with tiles of a different color or with larger rectangular formats, it is an economical option as well as very decorative.
There are basically 3 basic placement options:
a) On-line
The simplest: they are placed one on top of the other forming a grid. It is ideal for cleaner and more minimalist versions.
b) Half of the long side
As would be the case in horizontal brick laying, in this case a vertical strip is laid upwards, and the next strip is started halfway along the long side of the tile next to it.
c) Half of the short side
In this case the laying is done in horizontal sections instead of vertical ones, so that first a whole row of vertical tiles is laid and then the second row is started in the middle of the short side of the tile underneath.
Combination of tiles
Another very original idea to achieve a design bathroom with cheap tiles is to place them combining different sizes and/or areas, either on the same wall or on different walls.
For example, you can mix rectangular white tiles and squares of different sizes on the same wall to get away from the typical nondescript wall, or even create colored lines and get a spectacular effect.
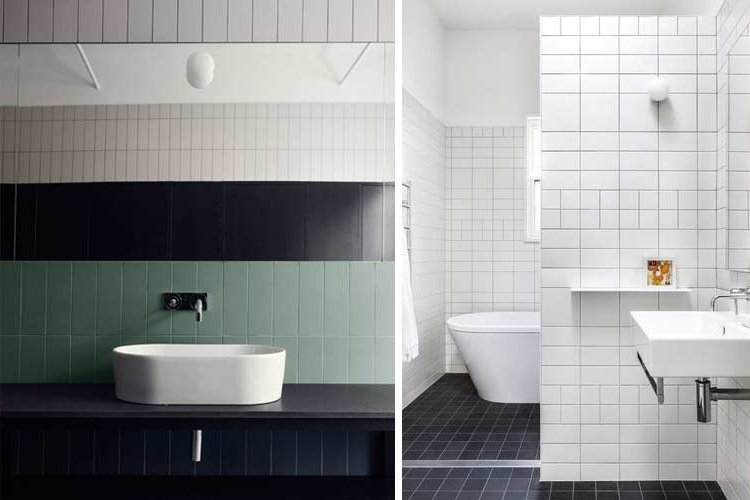
You can also combine this type of formats in different walls instead of the same wall. In this case it is usual to mark the different wall with another color or type of placement.
If your economy allows it, you can also use rectangular base tiles or simpler squares and then create a specific area with tiles of different formats.

In short, there are thousands of options to get out of the norm by laying tiles in a different way. Imagination is power!
 Alexandra Hays
 - 3.2K views